Master How to Record a Webex Meeting: A Quick Guide
Learn how to record webex meeting with simple steps, tips, and troubleshooting for clear, professional recordings.

tl;dr: If you're the host of a Webex meeting, just click the Record button in your control panel. You'll get an option to save the recording to the cloud (for easy sharing) or directly to your computer (as an MP4 file). That's it—one click and you're capturing everything.
Your Quick Guide to Recording a Webex Meeting
Ever had that sinking feeling halfway through an important meeting when you realize you forgot to press record? We've all been there. Knowing how to record a Webex meeting is a crucial skill, whether you're trying to capture key decisions, save a training session for later, or share an interview with colleagues who couldn't attend.
The process itself is incredibly simple, but the real choice is between saving your recording to the cloud or locally on your computer. Making the right decision from the start can save you a lot of hassle down the road.
If you're the meeting host or a co-host, the power to record is already at your fingertips. Your main decision is where that recording will live. Cloud recordings are fantastic for sharing a link instantly and accessing the meeting from any device. Local recordings, on the other hand, save an MP4 file directly to your computer, which is perfect for offline editing and storage.
Cloud vs. Local Recording at a Glance
So, how do you choose? It really comes down to what you plan to do with the recording. Do you need to share a link with a dozen people right away, or are you planning to edit the footage into a polished training video? This table breaks down the key differences to make your choice clear.
| Feature | Cloud Recording | Local Recording |
|---|---|---|
| Accessibility | Access from any device via your Webex account. | Only available on the computer it was saved to. |
| Sharing | Incredibly easy to share with a simple link and password. | Requires uploading a large file to another service first. |
| Features | Includes transcripts, chat logs, and participant lists. | Records only the main audio and video content. |
| Storage | Uses your organization's Webex cloud storage. | Takes up space on your local computer's hard drive. |
For sheer convenience, the cloud is usually the best option. But if you know you need that raw MP4 file for editing or for long-term archival on your own hardware, choosing a local recording is a solid move.
When you hit that record button, this is the simple prompt you'll see, laying out your two options clearly.

This little pop-up is your gateway to capturing the meeting. Once you have that recording, you can take it a step further. For advanced workflows, like turning your meeting audio into searchable text or generating accurate captions, check out the resources in our WhisperAI guides.
Who Can Record a Webex Meeting?
Have you ever tried to record an important presentation in Webex, only to find the 'Record' button is grayed out and mocking you? It’s a frustrating moment, but the reason is almost always the same: your role in the meeting.
In Webex, recording privileges aren't given to everyone. The power to record is tied to a clear hierarchy designed to keep meetings secure and organized. Understanding this structure is the key to knowing who has control.
The Host and Co-host Hold the Keys
At the very top is the Host. This is typically the person who scheduled the meeting, and they have complete control. The host can start, pause, and stop recordings at any time, choosing whether to save the file to the cloud or their local computer.
Right alongside the host is the Co-host. A host can promote any participant to the co-host role, granting them nearly identical powers. This is a fantastic feature for collaboration, as it allows someone else to manage the recording if the host is busy presenting or needs to leave early.
Crucially, co-hosts can also record the meeting. This is the single most important detail to remember if you're not the one who organized the call.
Key Takeaway: If you're a participant but you need to record, the fix is simple. Just ask the host to make you a co-host. They can do this with just a couple of clicks from the participant list, and the record button will instantly become available to you.
What About Everyone Else?
At the bottom of the hierarchy is the Participant (or Attendee). By default, participants have no recording privileges. This is a deliberate security and privacy feature to prevent conversations from being recorded without the organizer's knowledge. If you're a participant, the record button will be disabled.
So, what should you do if you're a guest speaker or a key team member who needs a copy? Be proactive.
- Before the meeting: This is the best approach. Send a quick email or message to the host. Explain why you need a recording and ask if they can either handle it and share the file later or simply make you a co-host once the meeting starts.
- During the meeting: If you realize you need to record mid-session, use the chat to send a private message to the host. A polite, "Hey [Host's Name], could you please make me a co-host? I need to record this part for my team," usually works perfectly.
The Ultimate Authority: The Site Admin
There's one more layer to this: the Webex Site Administrator. In most companies, an IT department sets the rules for the entire organization's Webex account.
An admin can create site-level policies that might, for instance, disable local recordings for everyone or restrict cloud storage access. If you're a host and you still can't record, it's likely not your fault—it's probably an organizational policy. In that case, your next step is to contact your IT support team to find out what's allowed on your company's account.
Recording a Webex Meeting on Your Computer
The short version: To record a Webex meeting on your computer, join as a host or co-host and hit the Record button in the bottom control panel. You'll get a choice: save the recording to the cloud for super easy sharing or download it directly to your computer as an MP4 file for offline use.
Let's dive into the details. Recording a Webex meeting from your computer gives you the most control. Whether you're using the full desktop app or joining through your web browser, the process is virtually identical. The most significant choice you'll have to make is between the convenience of the cloud and the control of having a local file.
But before you even look for the record button, remember that your role in the meeting is what matters most. Webex keeps a tight lid on who can record to maintain privacy and control.
As you might guess, this power is reserved for the people running the show.
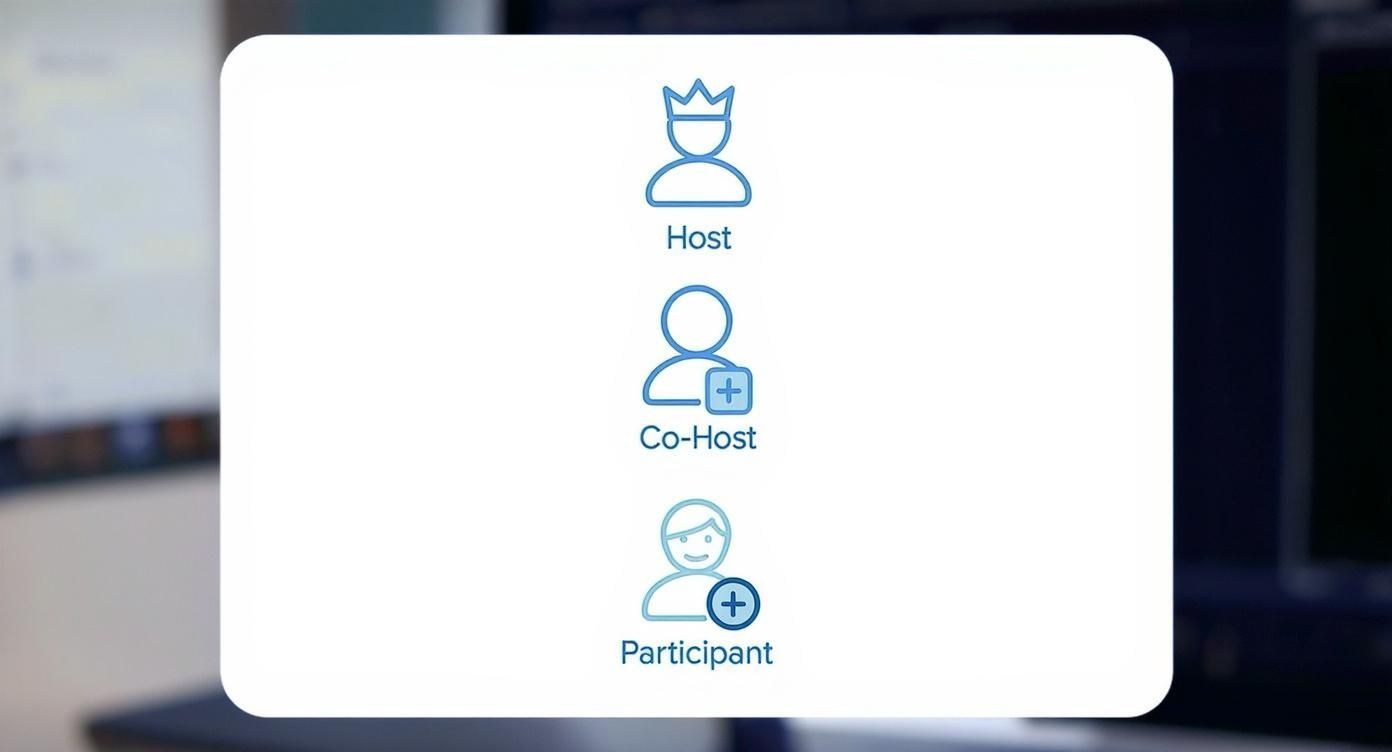
This makes it crystal clear: Hosts and Co-hosts are the gatekeepers. If you're a participant, you'll need to ask for permission to record.
Starting and Managing Your Recording
Once the meeting is live, your main controls are located in a toolbar at the bottom of the window. Find the Record button—it's usually a simple circle icon. One click is all it takes to get started.
As soon as you click it, Webex will ask the critical question: where do you want this recording to live?
- Record in cloud: This is my go-to choice for most situations. It saves the meeting to your Webex account's cloud storage and generates a simple link you can easily share with attendees. It's built for convenience.
- Record on my computer: This option saves the raw MP4 file straight to your hard drive. This is the right move if you need to edit the video later, have an unreliable internet connection, or if your company has strict data storage policies.
After you choose and click Record again, you're officially live. A red indicator will pop up, usually in the top corner of your screen, letting everyone know the session is being captured. It's a small but vital visual cue for transparency.
From there, you have full control. You can Pause and Resume the recording at any time using the same controls. I find this incredibly handy for cutting out the small talk during breaks or skipping over a section where someone's having technical difficulties. It saves a ton of editing time later on.
When you’re all done, just click Stop.
What Happens After You Stop Recording?
This part depends entirely on where you decided to save the file. The two workflows are quite different, so knowing what to expect is key, especially when people are waiting for the link.
If you saved it locally to your computer, things move quickly. Once the meeting ends, Webex processes the video and saves an MP4 file into a dedicated folder (usually in your Documents, inside a "Webex" folder). For an hour-long meeting, this might take a few minutes. Just remember, this local file is bare-bones—it only captures the main audio and video, not extra panels like the chat or Q&A.
Pro Tip: If you record locally, check your hard drive space first. HD video files are bigger than you think. A single one-hour meeting can easily take up a gigabyte or more, and if you run out of space mid-recording, the file will fail.
Cloud recordings, on the other hand, require a little more patience. After you hit stop, the file is uploaded to Webex servers for processing. This can take anywhere from a few minutes to as long as 24 hours for very long sessions. You'll receive an email as soon as it’s ready to view.
Cloud Recordings and Custom Layouts
This is where cloud recording truly shines. You don't just get a video file; you get a whole interactive package when you open it from your Webex User Hub.
- Interactive Panels: Viewers can see the chat log, Q&A, and even polling results right alongside the video playback.
- Automatic Transcripts: If your admin has enabled it, Webex will automatically transcribe the entire meeting, making the content completely searchable.
- Chapter Markers: You can add chapters to long recordings, letting viewers jump straight to the parts that matter most to them.
One of the most powerful features here is your control over the recording layout. Before you even start, you can decide what the final video will look like. You can lock the view on the main presenter, ensure it dynamically switches to whoever is speaking, or keep the grid view.
Getting this right from the start is what separates a decent recording from a professional one. Mastering these small details is the real key to knowing how to record a Webex meeting on your computer effectively.
How to Record a Webex Meeting on Your Phone
The Short Version: If you're the host or co-host, you can record a Webex meeting on your phone (iOS or Android). Just tap the "More options" button (the three dots) in the meeting controls and hit "Record." Keep in mind, all mobile recordings go straight to the cloud—you can't save them locally to your device.
In a world where your office can be anywhere from a coffee shop to the passenger seat of a car, knowing how to record a Webex meeting from your phone is no longer just a "nice-to-have" skill—it's essential. Thankfully, capturing those important conversations is just a few taps away.
But first, there's one major rule to understand about mobile recording: it's cloud-only. You can't save a recording file directly to your phone. This is a smart move by Webex, as it saves you from filling up your phone's storage with massive video files and ensures the recording process is more reliable since it doesn't depend on your phone's processing power.
Kicking Off a Recording on iOS and Android
Whether you're on an iPhone or an Android device, the process for starting a recording is pretty much identical. As the host or co-host, the controls are right where you'd expect them to be.
Once your meeting is live:
- Look for the More options button in the main control bar. It’s the one that looks like three dots (…).
- Tap it, and a menu will pop up. From there, just select Record.
- A small, red recording icon will appear on the screen. This is a clear signal to you and everyone else on the call that the session is officially being captured.
And that's it! The meeting will now be recorded and uploaded directly to your Webex cloud account after you end the call. To stop, just follow the same steps and tap Stop Recording.
Tips for a Clean Mobile Recording
Recording on the go presents a unique set of challenges that you don't typically encounter at a desk. A little bit of preparation can be the difference between a professional, clear recording and something that’s completely unusable.
Your best friend for mobile recording? A stable Wi-Fi connection. While you can record over a cellular network, a strong Wi-Fi signal is far less likely to drop, which means better audio and video quality for your final file.
Here are a few more pro tips to keep in mind:
- Silence Your Notifications: Before you hit record, put your phone in "Do Not Disturb" or "Focus" mode. Nothing ruins a key talking point faster than a series of text message dings popping up in the audio.
- Keep an Eye on Your Battery: Video recording is a huge power drain. Make sure your phone is either fully charged or, even better, plugged into a power source so it doesn't die halfway through an important discussion.
- Use a Headset: Your phone's built-in mic is designed to pick up everything around you. A headset with its own microphone will do a much better job of isolating your voice, leading to a massive improvement in audio clarity.
Once the meeting is over and the recording has been processed, you'll find it in your Webex User Hub, accessible from any device. From there, you can download the MP4 file, share the link with your team, or even run it through one of the best AI transcription apps to create a searchable document of the entire conversation.
How to Manage and Share Your Recordings
So, you’ve figured out how to record a Webex meeting. That’s great, but your job isn't quite done. Hitting the "stop" button is just the beginning. Now comes the crucial part: managing that recording to make sure the right people see it—and the wrong people don't. This is where you turn a simple video file into a valuable, secure asset.
Your central hub for all of this is the Webex User Hub. Think of it as your personal library where every meeting you've saved to the cloud gets processed and stored. After a meeting wraps up, Webex needs some time to process the file. For a short call, it might just take a few minutes, but for a longer, more complex session, it could take up to 24 hours. You’ll get an email the second it’s ready.

Once that notification hits your inbox, you can log in to your User Hub and find the recording waiting for you. From there, you have a whole suite of options to control who sees it and how they see it.
Securing Your Shared Recordings
Just grabbing a link and blasting it out in an email is easy, but it's rarely the smartest move, especially if the meeting covered sensitive information. Thankfully, Webex gives you some simple yet powerful tools to lock things down.
Before you share, take a look at these security layers:
- Password Protection: This is your first and best line of defense. You can set a unique password that anyone trying to view the recording will need to enter first.
- Prevent Downloads: By default, people with the link can often download the MP4 file directly. With a single click, you can turn this off. This forces them to stream the content from Webex, preventing copies from ending up on unsecured devices.
Real-World Scenario: Imagine you've just wrapped up a quarterly financial review. You need to share it with key stakeholders, but that data is highly confidential. By setting a strong password and disabling downloads, you ensure only the right people can view the information, and the video file itself doesn't get passed around or saved where it shouldn't be.
These controls give you real authority over who sees your content and what they can do with it. This becomes incredibly important for large-scale sessions. Webex can handle meetings with up to 1,000 participants, which makes secure sharing an absolute necessity for big organizations. For a closer look at these capabilities, check out the Webex statistics and insights from ElectroIQ.com.
Keeping Your Recording Library Organized
If you record meetings regularly, your User Hub can turn into a chaotic mess in no time. A cluttered library makes finding anything a nightmare. Trust me, putting a simple organizational system in place from day one will save you a ton of headaches later.
It all starts with a consistent naming convention. Don't just leave the default title like "John Doe's Personal Room." Rename it to something that actually means something.
A good format to follow is: [Project Name] - [Meeting Topic] - [YYYY-MM-DD]
For example: Project Phoenix - Q3 Kickoff - 2024-09-15
This one small habit makes your entire library searchable and easy to scan. It also helps you keep an eye on your organization's storage limits. Most Webex plans come with a set amount of cloud storage, and those big video files add up fast. Make it a habit to periodically review your recordings and delete old or irrelevant ones to free up precious space.
Here’s a quick summary of best practices to keep your recording library in top shape.
| Recording File Management Best Practices |
|---|
| Action |
| Rename Files |
| Add Passwords |
| Disable Downloads |
| Prune Regularly |
| Transcribe Key Meetings |
Following these simple steps will transform your recording library from a messy archive into a well-organized, secure resource.
Finally, think about accessibility. An organized recording is great, but a searchable one is a game-changer. This is where accurate transcripts become invaluable. You can explore our guide on AI audio transcription to see how easy it is to turn your meeting audio into a fully searchable text document, making every spoken word easy to find.
Tips for Better (and Compliant) Recordings
Knowing how to record a Webex meeting is one thing. Creating a recording that’s actually useful, professional, and compliant is another thing entirely. Anyone can hit the big red button, but the quality of what you get back often comes down to a few simple things you do before the meeting ever starts.
The single biggest factor isn’t your camera—it’s your audio. Seriously. Your laptop's built-in mic is designed to pick up everything, from the hum of your air conditioner to your coworker's dog barking in the next room. Investing in a simple external USB microphone is the fastest way to get clear, crisp audio that's easy for everyone to understand.
Nailing the Technical Basics
Beyond your mic, a few other quick checks can make a world of difference. You don't need a professional recording studio, just a little awareness of your surroundings.
Here are a few practical tips I always run through:
- Check Your Lighting: Don't be a silhouette. Make sure your main light source is in front of you, not behind you. Even a simple desk lamp or facing a window works wonders.
- Minimize Background Noise: At the start of the meeting, just ask everyone to mute their mics when they aren't speaking. It's basic meeting etiquette, but it’s your best defense against random, distracting noises.
- Use a Stable Connection: If you can, plug directly into your router with an ethernet cable. A wired connection is always more reliable than Wi-Fi and helps prevent your recording from freezing or dropping audio.
These little adjustments are all about prevention. They solve the most common recording headaches—like terrible audio or choppy video—before they even happen.
The Most Important Step: Getting Consent
This isn't just a "tip"; it's a non-negotiable requirement. Recording people without telling them is an ethical and legal minefield you want no part of.
Always, always, always start the meeting by announcing that you're going to record it. This gives anyone who isn't comfortable the chance to speak up or leave.
A simple, clear statement is all it takes. I usually say something like, "Just to let everyone know, I'll be recording this session for those who couldn't attend. Is everyone okay with that?" It sets a transparent tone and covers your bases.
This simple practice builds trust and helps ensure your recordings are both ethical and legally sound. It's also a fundamental part of making your content accessible. You can learn more about this in our guide on key accessibility features.
As a platform, Webex has grown into a massive enterprise tool, now serving around 650 million monthly participants. That incredible scale just highlights how critical these compliant recording practices are for its global user base. You can find more stats on the state of Webex on ucmarketing.co.uk.
Your Top Webex Recording Questions Answered
We’ve covered the nuts and bolts of how to record a Webex meeting, but a few specific questions always seem to pop up. Let’s get you some quick, clear answers to the most common recording snags people run into.
Can I Record Breakout Sessions?
This is a big one, especially for trainers and workshop facilitators. The short answer is no, Webex’s native recorder cannot capture individual breakout sessions.
The recording function is tied only to the main meeting room. If you hit record while everyone is in breakouts, you’ll just be capturing an empty main room. It's a limitation you definitely need to plan for.
What Happens if the Host Leaves the Meeting?
Ever started a critical recording and then had your internet drop? Good news: the recording doesn't just stop.
As long as you've assigned a co-host, the cloud recording will continue without a hitch. The co-host effectively takes over recording duties, and the session keeps getting captured until the last co-host leaves or someone manually stops it. It's a fantastic fail-safe.
Pro Tip: Make it a habit to assign at least one co-host before you start any important recording. It’s the single best way to ensure a connection issue on your end doesn't ruin the whole recording.
Are There Limits on Recording Length or File Size?
Webex doesn't have a hard time limit on individual recordings, so you won’t get cut off after two or three hours. You can theoretically record for as long as your meeting runs.
The real ceiling is your account's cloud storage space. Every recording chews up that storage, and once you hit your plan's limit, you simply can't save new cloud recordings. It’s a crucial detail many people forget about until they get that dreaded "storage full" error.
And when it comes to the privacy and security of that stored data, you can learn about WhisperAI's commitment to privacy and our rigorous standards for protecting your information.
Ready to turn those long Webex recordings into accurate, searchable text in minutes? WhisperAI uses advanced AI to transcribe your meetings with near-human accuracy across 100+ languages, handling complex terminology and background noise. Stop re-watching hours of video and start finding key information instantly. Get your professional transcription at WhisperAI.