How to Take Sound from Video: A Practical Guide for Creators
Learn how to take sound from video with practical methods. We cover free desktop tools, online converters, and mobile apps for clean audio extraction.
tl;dr: For quick audio grabs, use a simple online converter. For projects where quality is critical—like podcasting or transcription—use a free desktop tool like Audacity or VLC Media Player. This gives you total control over the audio format and ensures the best possible sound.
Ever stumble upon a video with the perfect sound for a podcast, a transcription project, or just a personal clip? When you need to take sound from video, the fastest route is often a simple online converter. But if quality and control are what you're really after, a free desktop tool like Audacity is your best friend.
This guide will break down the best options for any situation you might find yourself in, so you can get the audio you need without the usual headache.
Your Quick Guide to Audio Extraction
Knowing how to pull audio from video is a fundamental skill for content creators, marketers, and really, anyone working with media today. Think of this as your roadmap—a quick overview before we dive into the nitty-gritty of each method. The goal is simple: get you the clean audio you need, whether it's for a quick social media post or a high-stakes professional project.
It's a skill that's more in demand than ever. The market for audio and video editing software was valued at a massive US$4 billion in 2023 and is projected to hit nearly US$8 billion by 2033, growing at a steady clip of 7.1% annually. That tells you just how central this kind of work has become in our daily lives.
Choosing Your Extraction Method
The right tool for the job usually comes down to a classic trade-off: quality versus speed. This simple decision tree lays it out perfectly.
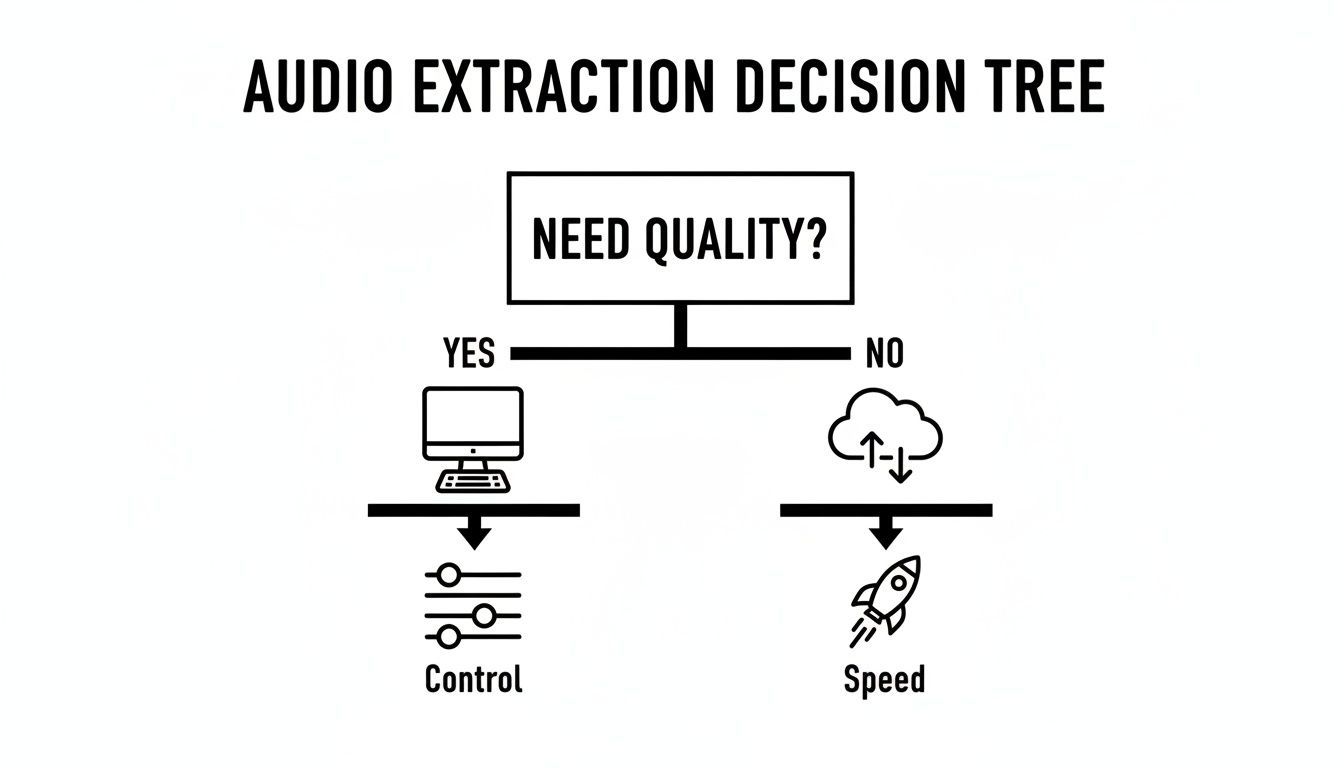
As you can see, if pristine audio is non-negotiable, desktop software gives you the most control. On the other hand, if you just need it done now, online tools are built for speed.
While we're talking about tools, it's worth noting that some platforms specializing in innovative short-form media solutions also include features for managing audio.
Of course, once you have your audio file, the next step is often turning it into text. If you're looking to create captions or subtitles, our detailed guide is a great next stop: https://whisperai.com/guides/video-transcription-subtitles
Key Takeaway: Let your project's needs guide your choice. For critical tasks like transcription where accuracy is everything, prioritizing audio quality with desktop software is the way to go. Online tools are perfect for quick, non-essential tasks where a little quality loss won't hurt.
Comparing Audio Extraction Methods
To help you decide at a glance, this table breaks down the most common methods for taking sound from video. It's a quick comparison to help you match the right tool to your specific needs.
| Method | Best For | Ease of Use | Output Quality | Cost |
|---|---|---|---|---|
| FFmpeg (CLI) | Batch processing, automation, and total control over formats and codecs. | Difficult | Highest | Free |
| VLC Media Player | Quick, one-off extractions on your desktop with a familiar tool. | Easy | High | Free |
| Audacity | Editing and cleaning up audio immediately after extraction. | Medium | Highest | Free |
| Online Converters | Fast extractions for non-sensitive files without installing software. | Easiest | Varies (Often Lower) | Free (with ads/limits) |
| Mobile Apps | On-the-go extractions directly on your phone or tablet. | Easy | Good | Free/Freemium |
Ultimately, having a couple of these tools in your back pocket is the best strategy. For serious work, nothing beats the control of desktop software, but for a quick grab, an online converter or mobile app is incredibly handy.
Using Desktop Software for High-Quality Audio
When you absolutely cannot compromise on audio quality, nothing beats dedicated desktop software. These tools are the gold standard because they give you complete control over the entire process, ensuring the sound you pull is clean, clear, and ready for whatever you need it for.
Unlike those quick online converters, desktop programs do all the work locally on your machine. This is a huge win for privacy, but it also means you sidestep the nasty compression algorithms that can degrade your audio quality online. You get to call the shots on format, bitrate, and every other setting.
This level of precision is exactly what you need for projects like building a podcast, archiving important recordings, or prepping audio for a high-accuracy transcription service where every little detail matters.
VLC Media Player: The Hidden Converter
It's funny, most of us have VLC Media Player on our computers but think of it as just a simple video player. But tucked away in its menus is a surprisingly powerful conversion tool that makes it incredibly easy to take sound from video.
It’s the perfect go-to when you need a high-quality extraction right now without having to hunt down and install new software. The process couldn't be more straightforward.
- Open up VLC and find your way to Media > Convert / Save.
- Add your video file, then click the Convert / Save button.
- In the next window, look for the "Profile" dropdown and pick an audio format like "Audio - MP3" or "Audio - FLAC".
- Finally, just choose where to save your new audio file and hit Start.
That's it. In just a few seconds, VLC will spit out a separate, audio-only file. It's an incredibly handy feature hiding in plain sight.
Pro Tip: For the best possible quality, I always recommend choosing a lossless format like FLAC or WAV. This keeps the original audio data completely intact, which is ideal if you plan on editing the sound later or need it for a critical transcription.
Audacity: The Audio Powerhouse
Now, if you need to do more than just extract the audio—if you need to actually edit it—then Audacity is the undisputed king of free software. It's a full-on digital audio workstation that lets you import video files directly, so you can isolate the audio track and work your magic.
This is my personal go-to when I know the audio needs a little TLC. For instance, if I'm pulling a clip from a long lecture recording, I can use Audacity to remove annoying background hum, even out the volume levels, and snip out irrelevant parts all in one shot.
Getting started is easy:
- Simply open Audacity and drag your video file right into the main window.
- The software automatically pulls in the audio track and shows you the waveform.
- From there, you just head to File > Export and pick your format—WAV, MP3, you name it.
This kind of seamless workflow is a massive time-saver. You don't have to bounce between one program for extracting and another for editing.
FFmpeg: The Command-Line Champion
For those of us who aren't afraid of the command line, FFmpeg is the fastest and most powerful tool out there, hands down. It's an open-source workhorse that can handle pretty much any media format you can throw at it, giving you absolute control over the extraction.
With one simple command, you can perform a lossless extraction. This means the audio is literally copied from the video file without any re-encoding or quality loss. The whole process is nearly instant, even with huge files.
The command I use most often is beautifully direct: ffmpeg -i yourvideo.mp4 -vn -acodec copy output.aac
Here’s a quick breakdown of what that does:
-i yourvideo.mp4: This is your input file.-vn: This little flag tells FFmpeg to completely ignore the video.-acodec copy: This is the magic part. It instructs FFmpeg to just copy the audio stream as-is, without re-compressing it.output.aac: This is just the name of your new audio file.
This direct-copy method is the purest way you can take sound from video, guaranteeing you get a perfect replica of the original audio. For streamers and content creators, understanding how hardware like the best capture cards for streaming pairs with software like FFmpeg is key to maintaining this top-tier quality from start to finish.
Ultimately, the right tool comes down to your specific needs. Once you have that pristine audio file, you can feed it into the best tools for the job. It's worth exploring some of the best AI transcription apps to see just how much clean audio improves your results.
Using Online Tools for Quick Audio Extraction
Sometimes, you just need to rip the audio from a video, and you need it done now. You don't want to mess around with installing software or digging through menus. This is where online audio extractors are incredibly useful. They run right in your browser, making them perfect for a quick one-off job or when you're working on a computer that isn't yours.
The process couldn't be simpler, really. You find a site, upload your video, pick an audio format if you're lucky, and hit "convert." In a minute or two, a download link pops up. It’s the definition of a quick and dirty solution that gets the job done with zero fuss.
But, as with most free online tools, that convenience comes with some strings attached.
The Real-World Trade-Offs
When you use a free service, you're playing in their sandbox. The biggest hurdle you'll likely hit is a file size limit. Most free tools will cap your uploads somewhere between 100MB and 500MB, which immediately rules out longer, high-quality videos.
You also give up a lot of control over the final quality. These services have to manage server costs, so they often apply some pretty aggressive compression. The result can be audio that sounds a bit flat or less clear than the original. It’s usually fine for grabbing a quick soundbite, but I wouldn't use it for something that needs professional-grade transcription.
Privacy is Paramount: The second you upload that file, it's out of your hands. I always make it a habit to glance at a site's privacy policy before uploading anything. If your video has sensitive or confidential information, just don't risk it—stick with a desktop application.
What to Watch For: Red Flags
Let's be honest, the world of free online converters can be a bit sketchy. It's easy to land on a site that's more interested in serving you ads than converting your file.
Here are a few red flags I’ve learned to spot immediately:
- An Avalanche of Ads: A couple of banners are one thing, but if the page is a chaotic mess of flashing ads and fake "Download" buttons, I'm out of there.
- Forcing a Sign-Up: You should never have to create an account or hand over your email for a simple conversion. That's usually just a ploy to get your data for their marketing lists.
- No Quality Options: A decent tool will at least let you choose between MP3, WAV, or AAC. If there are no options at all, you can bet you're getting a low-bitrate, heavily compressed file.
- Painfully Slow Speeds: While your own internet connection plays a role, a site that consistently crawls during upload or conversion is probably overloaded or poorly maintained.
My rule of thumb is simple: if a website feels off, it probably is. There are plenty of good ones out there, so just close the tab and find another.
The Bottom Line: When to Go Online
So, when does it actually make sense to use an online tool? I see them as the go-to for low-stakes tasks where speed is more important than perfect quality or security.
Think about situations like these:
- Grabbing a funny audio clip from a YouTube video for a personal project.
- Pulling the audio from a short family video you recorded on your phone.
- Doing a quick conversion on a public or borrowed computer.
For jobs like that, you can't beat the speed and simplicity of a browser-based tool. But for anything that demands high-fidelity audio, involves sensitive material, or is part of a professional workflow, you'll be much better off with the power and privacy of desktop software.
Once you have that clean audio file, you can feed it directly into a tool like WhisperAI's AI transcription to get a fast, accurate transcript in minutes.
How to Take Sound from Video on Mobile Devices
The short version: You don't need a computer for this. iPhone users can build a handy, reusable audio extractor with the free Shortcuts app. For Android users, a quick search on the Play Store for an app like "Video to MP3 Converter" is all you need.
Let’s be honest, your phone is probably your go-to camera. So why should you have to run to a computer just to take sound from video? It feels outdated and slow. Thankfully, both iOS and Android have excellent options for getting this done right where you are.
This need for on-the-go editing is a huge deal. The entire audio and video editing market is on a tear, projected to leap from $2 billion in 2023 to over $5 billion by 2030—that’s a massive 12.50% growth rate. This isn’t just about big studios; it's driven by everyday creators who need to work with their files instantly. You can dig into the market trends and detailed insights about this growth yourself.
Think about it. You catch a hilarious quote from a family member on video and want to pop just the audio into a group chat. Or you need a quick soundbite from a downloaded clip for an Instagram Story. This is where mobile extraction shines.
Creating an Audio Extractor on Your iPhone
For anyone with an iPhone, the slickest solution is already on your device. I'm talking about the Shortcuts app. It's an automation powerhouse that most people never even open. You can use it to build your own one-tap audio extractor, and it's way easier than it sounds.
Here’s the basic recipe for your shortcut:
- First, open the Shortcuts app and hit the + button to create a new one.
- Your first action is "Select Photos." Just search for it and add it to your workflow.
- Next, add the "Encode Media" action. Tap the little arrow to expand its options and, most importantly, toggle on "Audio Only." Here you can also pick your format—M4A is a solid choice.
- The final step is the "Save File" action. This lets you decide where the finished audio file goes each time you run the shortcut.
Once you’ve saved it, you can pull audio from any video in your camera roll whenever you want. It's private, fast, and completely free.
My Personal Tip: Give the shortcut a simple name like "Get Audio" and then add it to your Home Screen. It literally turns the entire process into a single tap, making it feel just like a dedicated app.
Finding the Right App for Android
On the Android side of things, the game plan is a little different. There isn't a perfect built-in equivalent to Apple's Shortcuts for this task, but the Google Play Store is packed with great apps that do the job. The trick is to find one that's trustworthy and doesn't bombard you with ads.
A couple of solid apps that I've seen work well are:
- Video to MP3 Converter: Does exactly what the name implies. It has a simple interface, handles a bunch of different file types, and even lets you trim the clip before you convert.
- Timbre: This one is more of a full audio/video editor, but its conversion tool is quick and reliable. It’s a great pick if you think you might also want to do other quick jobs like cutting or merging files.
A word of caution: always check the reviews and permissions before you install. A simple converter app has no business asking for your contacts or location. Stick with apps that have millions of downloads and a good track record to keep your data safe.
Once you have that clean audio file, it's ready for whatever comes next, whether that's sharing it with friends or sending it off for professional transcription with a service like WhisperAI's AI transcription.
Getting Your Extracted Audio Ready for Transcription
Alright, you’ve pulled the audio from your video file. That's the first big step, but don't rush off to transcribe it just yet. The quality of that audio file is the single biggest factor in getting a clean, accurate transcript.
Think of it this way: feeding a transcription AI a noisy, muffled file is like trying to have a conversation in a crowded, loud restaurant. It's going to mishear things, miss words entirely, and the result will be a jumbled mess. But if you give it a crystal-clear recording, you’ll get back a polished, near-perfect document.
This little bit of prep work is where the real magic happens. It’s what separates a frustrating, error-filled transcript from one that’s ready to use right away.
What’s the Best Audio Format to Use?
When you export your audio, you'll see a list of file formats. This isn't a trivial choice; it directly affects the raw data the transcription service has to work with. For our purposes, clarity is everything.
Here are the formats I always recommend:
- WAV (Waveform Audio File Format): This is the top dog for quality. WAV files are uncompressed, which means they contain every single bit of the original audio data. It’s a big file, but it’s the purest version of your sound.
- FLAC (Free Lossless Audio Codec): Think of FLAC as the smart, efficient cousin of WAV. It uses lossless compression, so you lose zero audio quality, but the file size is much more manageable. It's a fantastic middle ground.
- High-Bitrate MP3 (320 kbps): An MP3 is a "lossy" format, meaning it sheds some data to shrink the file. However, at a high bitrate like 320 kbps, it's practically impossible for both human ears and AI to tell the difference. This format gives you a great balance of quality and small file size.
My personal rule is pretty simple: for legal, professional, or any other mission-critical transcription, I stick with WAV. For just about everything else, a 320 kbps MP3 is more than enough to get an excellent result.
A Quick Word on Sample Rate and Bit Depth
You'll probably see settings for "sample rate" and "bit depth" in your export options. You don’t need to be an audio engineer, but knowing the basics helps you avoid creating unnecessarily huge files.
Sample Rate is how many times per second the audio is measured. For spoken word, 44.1 kHz (CD quality) or 48 kHz (video standard) is all you need. Going higher won't make your transcript any better.
Bit Depth handles the dynamic range—the difference between the loudest and softest sounds. A 16-bit depth is standard and provides more than enough detail for voice.
Quick Fixes for Better Accuracy
Even with perfect export settings, your audio might have some issues that can trip up an AI. A few minutes of cleanup in a free tool like Audacity can make a massive difference in your final transcript.
I focus on two quick edits that give the most bang for your buck:
- Noise Reduction: Almost every recording has some background hiss from an air conditioner, a computer fan, or electrical hum. Audacity's "Noise Reduction" effect is brilliant at isolating and removing this constant noise, letting the speaker's voice shine through.
- Normalization: If the audio volume goes up and down, "normalizing" it brings everything to a consistent level. This simple fix ensures the AI doesn't struggle to hear quiet phrases or get blown out by loud ones.
These small tweaks can seriously improve your transcription results. If you want to dive deeper into the whole process, our guide on how to best use an audio to text converter is a great next step.
The technology behind this is growing at an incredible pace. AI has completely changed how we take sound from video and put it to work. The AI video market alone was valued at USD 3.86 billion in 2024 and is projected to hit an eye-watering USD 42.29 billion by 2033. A huge chunk of that growth comes from video analysis, which relies heavily on audio extraction for transcription and captioning.
With your clean, well-formatted audio file in hand, you’re all set. The final step is to upload it to a powerful tool like WhisperAI, where all your prep work will pay off with a fast, accurate transcript.
Got Questions About Pulling Audio From Video?
Even after you've got the tools, a few questions always seem to pop up when you're starting to separate sound from video. That’s completely normal. Let's walk through some of the most common ones I hear, with some straightforward advice to help you get it right.
What's the Best Audio Format to Use?
This is a classic "it depends" situation. The best format really hinges on what you need the audio for. There’s no single winner, but there are definitely right and wrong choices for different jobs.
If you’re doing professional work, creating a long-term archive, or anything where quality is king, you'll want to stick with a lossless format.
- WAV: Think of WAV as the gold standard for uncompressed, pure audio. It's a perfect, bit-for-bit copy of the original, which makes it the go-to for serious editing or high-stakes transcription projects. The only real drawback is the hefty file size.
- FLAC: This is my personal favorite for archiving. FLAC gives you the exact same pristine quality as WAV, but its clever compression makes the files significantly smaller. It’s the best of both worlds for storing high-quality audio without devouring your hard drive.
For more common tasks—like grabbing clips to share, making content for social media, or most transcription work—a high-quality compressed format is usually the smarter, more practical choice.
My Go-To Recommendation: For most situations, a high-quality MP3 at 320kbps strikes the perfect balance between quality and file size. To the human ear, and even to sophisticated AI transcription engines, it's practically identical to a lossless file. It's a fantastic all-rounder.
When you're prepping audio for a service like the one at whisperai.com/ai-transcription, standard formats like MP3, WAV, and M4A all work perfectly, so choosing one of these will keep your workflow running smoothly.
Does Ripping the Audio Reduce Its Quality?
Great question. The short answer is: not if you do it correctly.
The actual process of separating the audio from the video doesn't hurt the quality at all. The risk of quality loss comes entirely from the format you choose to save it in.
Think of it this way: if you save the audio as a lossless file (like WAV or FLAC), you're making a perfect digital clone of the sound. No data is thrown away, so the quality is identical to what was in the original video.
The only time you lose quality is when you save to a "lossy" format, like a low-bitrate MP3. These formats achieve smaller file sizes by getting rid of audio information that our ears aren't as likely to notice. To prevent this, just make sure you select the highest quality setting available for whatever format you choose.
Can I Isolate Just One Audio Track From a Video?
Yes, you absolutely can, but whether it's possible depends on the video file itself and the tool you're using. Professional video files often contain multiple audio tracks—maybe one for dialogue, another for music, and a third for sound effects, or even tracks for different languages.
- Pro-Level Tools: Software like FFmpeg, or full-blown video editors like Adobe Premiere Pro or DaVinci Resolve, let you peer inside the video file and see all the different audio streams. From there, you can easily pick the one you want and export it.
- Simpler Tools: On the other hand, most basic converters and online tools are designed for simplicity. They'll almost always just grab the main, pre-mixed audio track and won't give you the option to choose.
So, if you know for a fact your video has multiple audio streams and you need to isolate a specific one, FFmpeg is easily the most powerful and reliable tool for the job.
Is It Legal to Rip the Audio from Any Video?
This is a huge one, and the answer is all about copyright law and what you plan to do with the audio. It’s not always a simple yes or no.
Generally speaking, you're in the clear if you're extracting audio from videos you made yourself or have permission to use. For everything else, it gets a bit murky. Using a short clip for personal research, commentary, or critique might be covered by "fair use," but that's a complex legal concept that changes from country to country.
Where you run into real trouble is using copyrighted audio from movies, music, or TV shows for your own projects, especially for commercial purposes, without getting a license. That's almost always illegal. The same goes for sharing it. When you're not sure, play it safe. Always respect copyright, and if you're going to use the audio in public or for your business, get the permissions you need first.
With those questions cleared up, you should be ready to tackle just about any audio extraction project. And when you need to turn that clean audio into accurate, usable text, WhisperAI has the professional-grade speed and precision you need. Get your AI transcription started at whisperai.com.