How to Record Audio on Mac: A Simple Guide for Crystal-Clear Sound
Learn how to record audio on Mac using built-in apps and external gear. This guide covers everything from quick notes to pro-level podcasting.
tl;dr: For a super-fast recording, open the Voice Memos app and hit the big red button. If you need a little more control, like choosing an external microphone, QuickTime Player is your best friend. For creative projects like podcasts or music, jump into GarageBand. All three are already on your Mac, and they're completely free.
So, you're ready to start recording on your Mac but aren't sure where to begin. The good news is, you don't need to spend a dime. Your Mac already has some surprisingly powerful tools built right in, perfect for everything from capturing a quick thought to laying the groundwork for your next big project.
It’s all about picking the right tool for the job. You wouldn't use a sledgehammer to hang a picture, right? Same idea here. Using a complex audio suite for a 30-second voice note is overkill, and trying to produce a podcast in Voice Memos will only lead to frustration.
Your Mac’s Built-In Recording Tools
Before you even think about dropping money on fancy software or an expensive microphone, get to know the apps Apple gave you for free. They're not just "good enough"—they're genuinely good. Since they’re baked into macOS, they’re stable, reliable, and couldn't be easier to use.
Here’s why I always tell people to start with the built-in apps:
- They're free. You can learn the ropes without any financial commitment.
- They're simple. Both Voice Memos and QuickTime have clean interfaces that let you start recording in seconds.
- They're always there. No downloads, no installation. Just open and record whenever an idea strikes.
- They handle most jobs. For everyday tasks like recording meetings, taking audio notes, or simple interviews, these apps are more than capable.
A common mistake is assuming you need expensive gear from day one. In reality, mastering the built-in microphone and free software on your Mac will teach you 90% of what you need to know about good recording practices, like finding a quiet space and speaking clearly.
Think of it as a training ground. You can use QuickTime Player to test how different rooms in your house affect sound quality—move from the echoey kitchen to a closet full of clothes and hear the difference for yourself. This kind of hands-on practice costs you nothing but teaches you everything. Once you can consistently get clean audio with the basics, you’ll know exactly what you need when it’s time to upgrade.
And once you've captured that perfect recording, you’ll probably want to turn it into text. A service like WhisperAI is a fantastic next step, offering incredibly fast and secure AI transcription.
Now, let's dive into exactly how to use these built-in apps, step by step.
Your Mac is packed with some surprisingly powerful audio tools right out of the box. But figuring out which one to use can feel like a guessing game. It’s not really about which app is "best"—it's about which one is right for the job at hand.
Let’s cut through the noise and figure out when to reach for Voice Memos, QuickTime, or GarageBand.
Which Built-In Mac App Should You Use to Record Audio?
To make it even simpler, here’s a quick comparison to help you choose the best free Mac recording app for your specific task, from quick notes to multi-track projects.
| App | Best For | Key Feature | Skill Level |
|---|---|---|---|
| Voice Memos | Quick notes, reminders, and capturing ideas on the fly. | iCloud sync across all your Apple devices. | Beginner |
| QuickTime Player | Lectures, interviews, and simple high-quality recordings. | The ability to choose your mic and quality settings. | Beginner |
| GarageBand | Podcasts, music, and layered audio projects. | Multi-track recording and a full editing suite. | Intermediate |
Think of this table as your cheat sheet. Now, let’s dive a little deeper into what makes each one tick.
Voice Memos: Your Digital Notepad
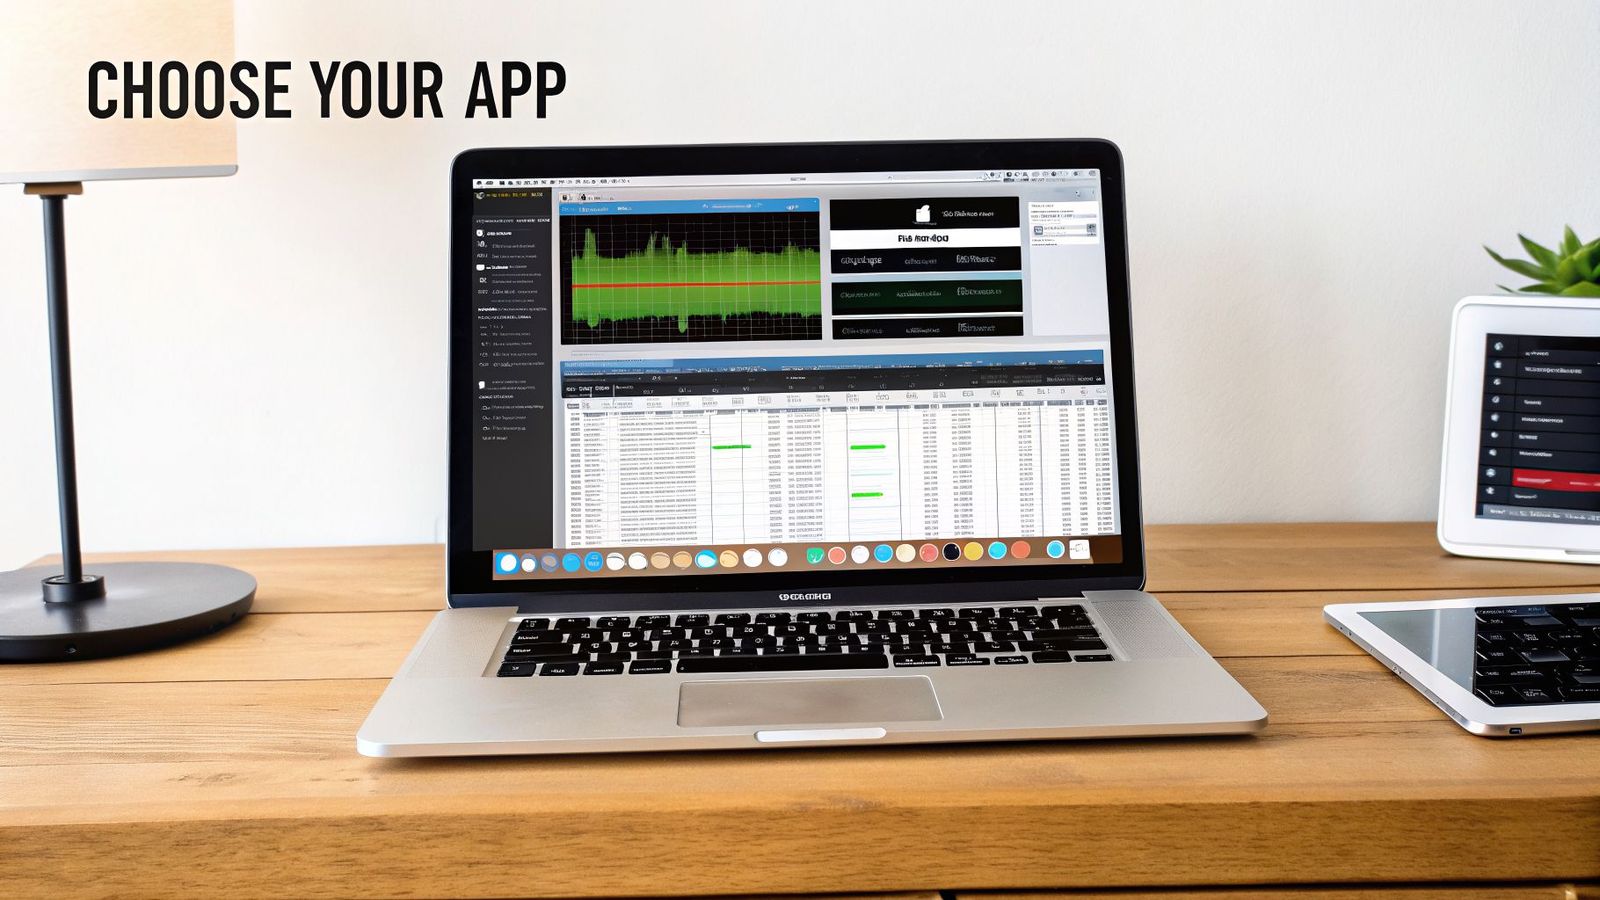
Think of Voice Memos as the audio equivalent of a sticky note. It’s designed for one thing: capturing a thought the second it strikes you. If you need to dictate a quick meeting summary or record a reminder for later, this is your app.
The real magic is its "it just works" simplicity.
- One-Click Recording: That giant red button is all you need. No menus, no setup, just press and talk.
- iCloud Sync: This is a game-changer. Record an idea on your iPhone during your commute, and it’s already on your Mac when you get to your desk.
- Simple Edits: You can easily trim silence from the beginning or end, which is perfect for tidying up a quick note.
Of course, that simplicity is also its biggest limitation. You can't select an external microphone, change the file format, or see your audio levels. It's built for speed, not for control.
QuickTime Player: The Versatile Workhorse
Often overlooked, QuickTime Player is the unsung hero for most everyday recording tasks. While everyone knows it as a video player, its "New Audio Recording" function is a huge step up from Voice Memos without getting complicated.
This makes it perfect for students who need to record a lecture or anyone conducting a straightforward interview. The key advantage is having just enough control. Next to the record button, a small dropdown menu lets you:
- Choose Your Mic: Easily switch between the internal Mac microphone and any external USB mic you have plugged in.
- Set Your Quality: Pick between "High" (a good, compressed AAC file) and "Maximum" (a large, uncompressed file) to balance file size with fidelity.
- Watch Your Levels: A simple audio meter gives you a visual cue, so you know if you're speaking too softly or too loudly (and causing distortion).
Honestly, QuickTime is my go-to recommendation for about 80% of recording needs. It hits that perfect sweet spot of being incredibly easy to use while offering the essential controls you need for a clean, reliable recording.
It saves a standard M4A file that works everywhere, making it the ideal middle-ground tool for when you need a solid audio file without any fuss.
GarageBand: The Free Creative Studio
When you’re ready to move beyond just capturing audio and start producing it, it’s time to open GarageBand. This isn't just a recorder; it's a complete Digital Audio Workstation (DAW) that Apple gives you for free. If you're thinking about starting a podcast, recording music, or creating any kind of polished audio project, this is where you should be.
The power of free, high-quality tools like GarageBand is reshaping the creator economy. The global market for DAWs was valued at $3.46 billion in 2024 and is expected to climb to $7 billion by 2033. A huge part of that growth is driven by Mac users, with the segment projected to grow at a 10.26% CAGR as more creators pair Apple's powerful hardware with pro-level software.
With GarageBand, the possibilities open up dramatically. You can:
- Record on Multiple Tracks: This is essential for projects like podcasts, where you want your voice, your guest, and your intro music on separate layers.
- Add Pro Effects: Polish your sound with built-in tools like EQ, compression, and reverb.
- Edit with Precision: Go way beyond simple trimming. You can cut, move, fade, and manipulate audio clips to get everything just right.
- Tap into a Sound Library: It comes with a massive collection of free loops, instruments, and sound effects to get you started.
Yes, there's a bit of a learning curve compared to the other apps. But the creative control you gain is enormous. For anyone wanting to record audio on Mac for a creative project, mastering GarageBand is a skill that will pay off tenfold.
Upgrade Your Sound with External Mics and Gear
Let's be honest: while your Mac's built-in mic is fine for a quick FaceTime call, it’s the first thing you should upgrade for better audio. Moving to an external microphone is the single biggest leap in quality you can make. It's the difference between sounding like you're in a tunnel and sounding like you're in the room.
If you want to dramatically improve your audio, switching from the built-in mic is non-negotiable. A simple USB mic is a huge step up, but for truly professional results, an XLR mic and audio interface is the way to go.
Diving into audio gear can feel overwhelming, but it really just comes down to two main paths. You don't need to be a sound engineer to figure this out.
The Plug-and-Play Path with USB Microphones
For most people looking to record audio on Mac—whether for podcasts, streaming, or just making a great impression on client calls—a USB microphone is the sweet spot. They are designed to be dead simple: plug one into your Mac's USB port, and you're good to go.
The Blue Yeti is a classic for a reason. It’s a favorite in home offices and for new creators because it provides fantastic clarity without a complicated setup. Just choose it as your input source in QuickTime or GarageBand, and the improvement over the internal mic is immediate and obvious.
Here’s why a USB mic is such a solid choice for most people:
- Simplicity: There’s no extra hardware to worry about. It’s a genuine plug-and-play experience.
- Cost-Effective: You get the microphone and all the necessary tech built right in, often for under $150.
- Great Quality: Modern USB mics deliver excellent sound that’s more than enough for most creative and professional projects.
The Professional Route with XLR Mics and Interfaces
If you’re serious about your audio—maybe you're launching a podcast or want broadcast-quality sound—the next level is an XLR microphone paired with an audio interface. This is the standard setup you'll see in any professional recording studio, and for good reason.
Unlike USB mics, XLR mics have a different connector and need a separate box called an audio interface to talk to your Mac. This little box, like one from the popular Focusrite Scarlett series, is the bridge. It takes the pure analog signal from the mic and converts it into a digital one your computer can use.
This combination gives you far more control and superior quality. A legendary setup for podcasters is the Shure SM7B microphone running into a Focusrite Scarlett 2i2 interface. It’s the formula for that warm, rich, "radio voice" tone that's so sought after.
An audio interface does more than just connect your mic. It provides better preamps for a cleaner signal, physical knobs for adjusting volume, and the ability to connect multiple microphones at once.
If you want to get serious about your sound, the best audio interface for streaming or recording is a foundational piece of gear. It opens up a whole new world of quality and control.
Essential Accessories That Make a Real Difference
Getting a great microphone is only part of the puzzle. A couple of cheap accessories are absolutely essential for getting that polished, professional sound and avoiding common amateur mistakes.
Pop Filters Have you ever heard a recording where the "p" and "b" sounds are harsh and explosive? Those are called "plosives," and they happen when a burst of air hits the microphone capsule directly. A pop filter is a simple mesh screen that sits between you and the mic, softening that burst of air and eliminating the problem entirely.
Shock Mounts Mics are extremely sensitive to vibrations. Bumping your desk, typing loudly, or even just heavy footsteps can travel right up the mic stand and create a low, rumbly noise in your recording. A shock mount cradles the microphone in an elastic suspension, isolating it from these vibrations and keeping your audio pristine.
Spending a little extra on these two items protects your investment in a good microphone and ensures your efforts to record audio on Mac pay off with a clean, flawless final track. It's these small details that separate the pros from the amateurs.
Advanced Mac Audio Recording Techniques
So, you’ve nailed the basics. You know your way around QuickTime and GarageBand, and maybe you've even plugged in a USB mic. But what happens when you hit a wall? Two common roadblocks pop up all the time: trying to record the audio playing from your Mac, and figuring out how to record two people at once.
This is where things get interesting. By default, macOS simply won't let you record system audio—the sound from a YouTube video, a webinar, or a game. It's a built-in limitation for security and copyright reasons, but it can be a real headache for legitimate projects.
To get past these limits, you often need to upgrade your gear. The journey usually looks something like this:
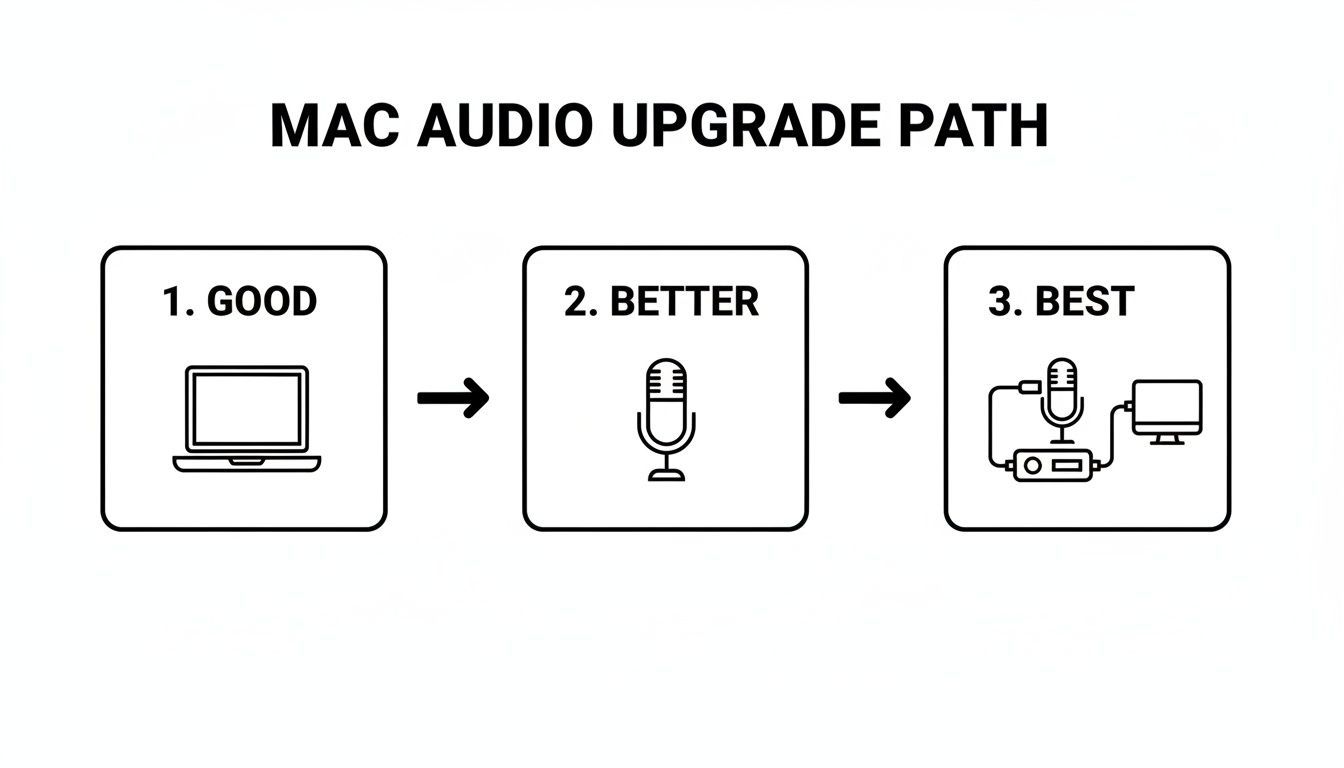
As you can see, an XLR mic and an audio interface represent the "best" setup. This isn't just about sound quality; it's about having the flexibility you need for more complex recording scenarios.
How to Record Your Mac’s System Audio
To capture what's playing on your Mac, you need a clever workaround. The idea is to create a "virtual" audio device that routes your computer's sound output back as an input, tricking your Mac into letting you record it. It sounds technical, but free tools make it surprisingly simple.
For years, the go-to solution has been a free utility called Soundflower. Here’s how it works:
- First, you install Soundflower, which shows up as a new audio device on your Mac.
- Next, head to System Settings > Sound and set your Mac's output to "Soundflower (2ch)". Now, all system audio goes to this virtual device instead of your speakers.
- Finally, in your recording app (like QuickTime), you just select "Soundflower (2ch)" as your microphone input.
Just like that, your software is now listening to and recording whatever your Mac is playing. It's fantastic for capturing audio from a live presentation or a video clip you need for a project. For a more modern and powerful (but paid) option, professionals often rely on Rogue Amoeba's Loopback, which gives you a slick, visual way to route audio between different apps.
Recording from Two Microphones at Once
If you're interviewing someone in the same room or co-hosting a podcast, you absolutely want to use two separate microphones. It gives you independent control over each person’s voice, which is a lifesaver in post-production. Trust me, trying to capture two people with one mic is a recipe for disaster—someone will always be too loud or too quiet.
The right way to do this is with an audio interface that has at least two inputs.
- Plug each microphone into a separate input on the interface (Mic 1 to Input 1, Mic 2 to Input 2).
- Connect the interface to your Mac, usually via USB or Thunderbolt.
Now, fire up GarageBand. When you create a project, add two audio tracks. Set the first track's input to "Input 1" from your interface, and the second track's input to "Input 2". When you hit record, each mic will record to its own dedicated track, completely separate from the other.
Capturing each speaker on a separate track is non-negotiable for high-quality interviews and podcasts. It allows you to adjust the volume, apply noise reduction, and edit out mistakes for one person without affecting the other's audio.
The rock-solid stability of macOS is a huge reason it's the platform of choice for these kinds of setups. The entire music production software market, valued at over USD 8,442.83 million in 2025, depends on the low-latency performance of the Mac's Core Audio system. That same reliability is why professionals in law and healthcare trust their Macs to record audio on Mac without a hitch.
When you start using multiple inputs and routing audio, you'll need to be aware of potential issues like audio latency, which can cause a distracting delay. It's also a good time to think about file formats. If you're recording multiple tracks in GarageBand, understanding the differences between MP3 and WAV will help you preserve the highest possible quality for editing.
Turn Your Mac Recordings into Transcripts
So, you’ve recorded your audio on your Mac. Great! But a raw audio file is only half the battle. The real goal is to turn those spoken words into something you can actually use—text that you can edit, search, and share.
Let’s walk through the final, crucial step: creating a fast, accurate transcript from your recording. The short version? Export your audio as an MP3 or M4A, then upload it to a secure service like WhisperAI for a transcript complete with speaker labels and support for over 100 languages.
An audio file sitting on your desktop doesn't do much good on its own. To make your content truly valuable, you need to unlock the words within. This workflow will show you how to take your raw recording and transform it into a polished, usable document.
Preparing Your Audio for Transcription
Before you can transcribe anything, you need to get your audio out of its original app and into a universally accepted format. Whether you used QuickTime for a quick interview or layered multiple tracks in GarageBand for a podcast, the export process is pretty simple.
Most transcription platforms work best with these two formats:
- MP3: This is the industry standard for a reason. It gives you a fantastic balance of manageable file size and clear audio quality, making it perfect for uploading.
- M4A (AAC): As Apple's native format, M4A often delivers slightly better quality than an MP3 of the same size.
If you recorded in QuickTime, you're in luck—it saves as an M4A by default. For GarageBand users, just go to Share > Export Song to Disk… and choose either MP3 or M4A. For most voice recordings, a quality setting of 128 kbps is the sweet spot. It keeps the file size down without sacrificing vocal clarity.
Choosing a Business-Grade Transcription Platform
With your audio file ready to go, the next move is finding the right transcription service. For any professional work, you need a tool built for accuracy, security, and the messiness of real-world audio. This is where a service like WhisperAI really shines.
It’s designed to handle challenges that trip up basic tools—things like multiple speakers talking over each other, faint background noise, or industry-specific jargon. This is about getting the right words, attributed to the right person, every time.
The process is incredibly straightforward. A clean interface guides you to upload your file and get the process started in just a few clicks.
From Audio File to Actionable Document
Once you upload your MP3 or M4A, the AI takes over. But modern transcription goes far beyond just converting speech to text.
Here are the key features that make the workflow so effective:
- Automatic Speaker Detection: The AI automatically figures out who is speaking and labels their dialogue. This is a massive time-saver for interviews, meetings, and podcasts.
- High Accuracy and Language Support: Sophisticated AI can achieve near-human accuracy across over 100 languages, handling a wide range of accents with ease.
- Large File Handling: Professional platforms are built to handle big files (often 500MB or more), so you don't have to worry about that hour-long keynote recording being too large to process.
Recording your audio is like gathering raw materials. Transcribing it is the process that turns those materials into a finished product—a searchable, editable, and valuable document.
After the transcription is finished, you can use a simple in-browser editor to make final tweaks. From there, you can export the text in whatever format you need—DOCX for reports, SRT for video captions, or just a plain TXT file. This complete workflow is what makes the effort to record audio on Mac pay off.
And if you happen to use Apple's built-in app, we have a specific guide to help you transcribe your Apple Voice Memos quickly.
Common Questions About Recording Audio on Mac
Once you've nailed down the basics, a few practical questions always seem to pop up. These are the real-world hurdles you'll hit when you start recording on your Mac more often. Let's get them sorted out so you can get back to creating.
What Is the Best Audio Format for My Mac Recordings?
Picking the right audio format feels like a classic trade-off between pristine quality and manageable file size. There isn't a single "best" format for everything, but there's definitely a right choice for what you're doing.
Here’s how I think about it:
- WAV (or AIFF): This is your raw, uncompressed, "lossless" file. Think of it as the original master tape—it has every single detail of the sound. It's the only format I use for serious multi-track editing in GarageBand, but be warned, the files are massive.
- M4A (AAC): This is Apple’s default and for good reason. It’s what QuickTime spits out, offering fantastic sound quality at a fraction of the size of a WAV file. For 90% of recordings like interviews, lectures, or quick voice notes, M4A is the sweet spot.
- MP3: The king of compatibility. While M4A might have a slight quality advantage at the same file size, an MP3 will play on literally any device known to man. It's a bulletproof choice for audio you plan to share widely or upload for transcription.
My rule of thumb? Start with M4A. It’s efficient and sounds great. If you're a musician or podcaster doing heavy-duty editing, record and edit in WAV, then export your final mix as an MP3 or M4A for sharing.
How Can I Reduce Background Noise in My Recordings?
Nothing tanks a recording faster than background noise. The low hum of a refrigerator, the distant rumble of traffic, even the clicks of your own keyboard can be incredibly distracting. You can’t always find a perfectly silent room, but you can fight back.
Your number one weapon is microphone placement. Seriously. Getting your mic close to your mouth—about 6-8 inches is a good starting point—makes your voice the dominant sound source. This simple adjustment will give you the biggest bang for your buck, period.
Beyond that, a few other tricks can make a huge difference:
- Soften Your Space: Record in a room with carpet, curtains, or even a walk-in closet. Hard, flat surfaces like tile floors and bare walls are echo-machines that amplify every little noise.
- Use GarageBand's Noise Gate: For that persistent, low-level hiss, GarageBand has a built-in "Noise Gate." This tool smartly mutes the audio when you aren't speaking, which cleans up the silence between your words. A little goes a very long way here, so be gentle with the settings.
Is It Possible to Record a Phone Call on My Mac?
This one comes up a lot, but you need to be careful. In many states and countries, it's illegal to record a call without getting consent from everyone on the line. Always check your local laws before you even think about hitting record.
From a technical standpoint, macOS doesn't have a built-in feature for this. The simplest, low-tech way is to put your iPhone on speakerphone and place a good external mic nearby. The quality won't be amazing, but it works in a pinch. For better audio, you’ll need to look at third-party apps specifically designed for call recording, as they handle the tricky audio routing and often help with the consent process.
Once your recording is captured and cleaned up, the next step is putting it to work. At WhisperAI, we turn hours of audio into precise, searchable text in just minutes. Simply upload your finished M4A or MP3 file, and our platform will deliver a professional-grade transcript ready for any project. See how fast and secure transcription can be by visiting whisperai.com/ai-transcription.